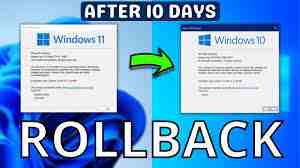
Microsoft is now releasing its most recent operating system, Windows 11, to suitable devices. Windows 11 offers some handy enhancements, as well as some significant improvements over Windows 10. However, if you take the jump and install Windows 11 — and later regret it there’s a simple way to come out. It’s if you act quickly.
After installing and downloading Windows 11, you only get ten days to convert your computer to Windows 10. If you roll back to the previous OS, all information stored on your PC will update itself, so you won’t have to worry about your data disappearing.
How do you go back to Windows 11?
Microsoft releases regular updates to Windows 11. The updates are designed to solve known bugs and introduce additional features. High-quality updates that contain security and bug fixes are often released (typically on the second Tuesday of each month). Feature updates, however, come out every six months. They usually include additional feature improvements, enhancing your OS’s efficiency.
Sometimes, updates could fix some issues. However, they could also cause more. Also, there could be a moment when the update is not installed correctly. This could sometimes result in unstable systems, drivers, and performance issues. In extreme cases, brutal crashes and the inability to start Windows 11. Updates may cause software compatibility issues, and this is especially true after a Feature update is being installed. If you’ve spent a lot of time looking for solutions to your system’s issues but failed to resolve them, reverting the system to Windows 11 may be the answer.
When you must restore your data from the last backup, make sure you make backups of your data if there is a problem; therefore, ensure you keep an external drive available!
Windows 11 rollback grace period
Since the Windows 10 Anniversary Update (version 1607), Microsoft shortened the period during which you can use the rollback option. Before this biannual update, there was an opportunity to roll back for 30 days. After this Anniversary Update was released, Microsoft reduced the grace period to ten days. If you fall outside the timeframe of 10 days, you’ll have to do a complete clean installation of the prior version of Windows 11 manually.
If unsure about the grace period, click the Windows icon and enter Reset. If you see that the “Go back” box appears grayed out, you’ll have to complete the process of rolling back manually.
What is the best way to go back Windows 11 to Windows 10
Here are the steps to change and get back into Windows 10: Start menu > Settings Windows Update > Advanced Options > Recovery and Previous Version of Windows (you could opt to go back). That’s it!
When ten days have passed, however, you’ll be able to revert to Windows 10, but it’ll be more complicated. You’ll have to back up your information and perform what Microsoft describes as”a “clean installing” in Windows 10 on your PC. If you back up your PC before switching to Windows 11 in the first place, you’ll be able to back up from the backup.
How do I get back Windows 10 Windows 10 from Windows 11
Suppose you go with Windows 10 and use Windows 10 four more times until Microsoft ceases to support it by October 2025. If the countdown of 10 days sounds like something new, it’s since Windows 10 initially launched with 30 days for rollbacks.
You updated to Windows 11 fewer than ten days ago and would like to return to Windows 10. It’s easy. Start by going into Settings, System, and Recovery. In the Recovery options, You should see Return to the previous version. If this version doesn’t work, try returning and installing Windows 10.
Before starting the journey, be aware that if you’ve downloaded any software or changed any settings in Windows 11, they may not make it in Windows 10 intact. Since Windows 11 has been in for less than ten days, you should be able to say that you’ve yet to make any significant adjustments. For more information, click the”Go back” button.
How can I upgrade Windows 11 to Windows 11 to Windows 10?
The initial part of this guide is only applicable if it’s been less than ten days before you updated to Windows 11. If you’ve been in the last ten days, we’ve some tips to give you in the second part of our guide. The whole thing might seem frightening but do not be concerned. This guide will help you with this.
Step 1: To start reverting Windows 11 to Windows 10, You’ll need to go to the Windows 11 settings page. Press the Windows Key and me on your keyboard in a program or workstation.
Step 2: Following this, go to Windows Update in the sidebar. That’s where you’ll want to be during the subsequent steps. Windows Update is likely home to all things related to device and software updates and scheduling. It’s also the place to sign up for the Windows Insider program. It’s unnecessary to think about them because the main focus is updating history in the next stage.
Step 3: In the next step, click Update History at the top of the screen. Scrolling to the bottom to view the update history may be necessary. After that, you can scroll over the list of updates installed for Recovery Options.
Reverting from Windows 10 involves using the earlier mentioned backup, which Windows 11 generated, and Recovery Options is your primary option to do this. Remember that this option will only be available within ten days of upgrading to Windows 11. After ten days, this option will disappear, and you’ll be required to look for a different option near the end of our tutorial.
Step 4: After you hit”Go Back,” Microsoft asks why you’ve chosen to change to Windows 10. You can select any from the options that appear on the screen or type in your own answers. Your answers will aid in the process of developing Windows 11. Once you’ve filled it in, click Next at the end of the page.
Windows 11 will then ask whether you want to search for updates. This could fix any issues you’re experiencing (like problems with performance caused by AMD GPUs). Give the option a try. If this doesn’t work, try using the steps above again, but pick No.
Microsoft will inform you about issues related to the information mentioned at the beginning of the section, and you can agree to the warning by clicking Next. Remember that you’ll have to keep your password to log into Windows 10, so don’t forget that password. After that, click Next to confirm.
Step 5: Once you have clicked Next several times, Windows 11 will give you the option to return to the Windows 10 button. Select this, and then Windows 11 will do its magic. The PC will then roll back to Windows 10 automatically. Based on the speed of your computer, this should be less than five minutes. The computer will reboot approximately twice, and when it is done, you’ll be returned to the Windows 10 desktop.
Remove Windows 11: new installation of Windows 10
Suppose the downgrade isn’t feasible (anymore) because of one or more of the reasons mentioned previously in the previous paragraph. In that case, the “Go back” option from the recovery menu is grayed out. Windows says, “This option is not offered on this machine.”
If so, you may remove Windows 11 by performing a total reinstallation of Windows 10. Follow the steps below:
1. Go directly to Microsoft’s official Microsoft Download webpage on Windows 10.
2. Click “Download tool right now” and save the file on your device.
3. Launch your MediaCreationTool by double-clicking on it.
4. Accept the conditions of licensing.
5. Select”Create Installation Media” from the menu “Create Installation Media” and then click “Next”.
6. Select the language you want to use for your system, the Windows 10 edition, and the correct architecture, and select “Next” once more.
7. Now, you can copy the installation data for Windows 10 to a USB stick (required storage space of 8GB) or create an ISO file to create the installation DVD.
Re-upgrade after ten days.
You’d like to have for more than ten days utilize Windows 11 but still want the possibility of going back to Windows 10. It is possible to check the remaining days and extend the deadline by at least 60 using an easy Microsoft command line utility. In the search box, enter cmd. In your search results, select the command prompt to Run as Administrator to launch the command prompt with administrative rights.
At the command prompt, type the following string: DISM /Online /Get-OSUninstallWindow. The number following the word Uninstall Window shows the days left.
Check on the days left.
To extend the deadline, type the following string: DISM /Online /Set-OSUninstallWindow /Value, replacing it with the days you wish to apply. For example, to set the deadline for downgrading to 30 days, type DISM /Online /Set-OSUninstallWindow /Value:30. It is possible to select the date for as low as two or as long as 60 days.