When you’re a DIY’er, no longer some element’s greater quality than locating cunning techniques to the characteristic individual to regular objects like purses, blankets or vacation programs (’tis the season). One of our favorite methods to provide humdrum gadgets a piece flair? Yarn tassels!
As part of the GH Stitch Club’s cause to teach craft lovers the joy of crochet, knitting, macramé and more, we share a smooth step-thru-step guide on making a yarn tassel. The video above is many less than four minutes and explains how to embellish all sorts of gadgets with an easy yarn tassel.
And the tremendous difficulty is that it no longer requires much time or cash to carry this fun mission to life. Only four number-one materials are wished — and you can have some already at home. In addition to the video instructional, test the written commands below for extra info on the technique.
SUPPLIES FOR MAKING TASSELS
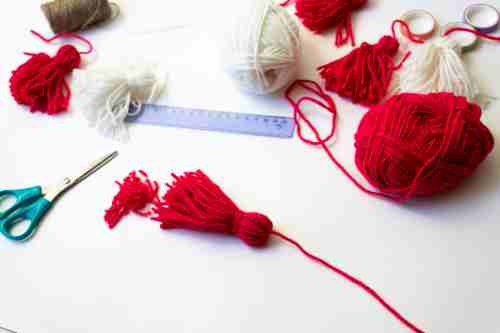
- Yarn – you may use wool, embroidery thread or crochet thread. I used crochet thread in this educational.
- Heavy Cardboard – Don’t go to the stores. You can surely break up a cereal container from your pantry
- Large tapestry needle – While this isn’t crucial, it is excellent to apply to cover the knotted ends.
- Scissors
How to do it
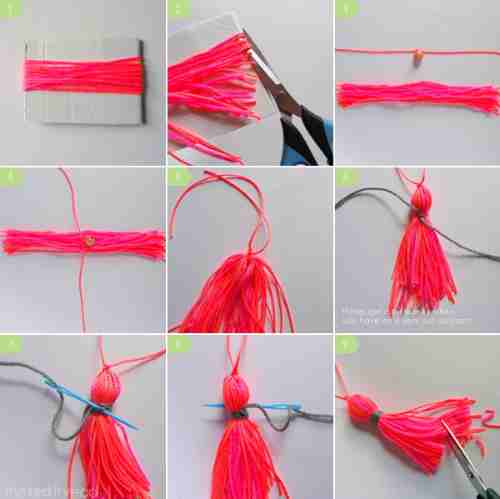
STEP 1
Cut a winding board from heavy card stock, cardboard, or foam board; the board needs to be double the duration of the completed tassel. Wind the thread across the board in taut loops until you achieve the favored fullness (the tassel may be twice as long because of the loop across the board).
STEP 2
Lay a 5-inch piece of thread horizontally on the painting’s floor. Slide wound thread off the board, and center it on a 5-inch thread. Tie the five-inch thread properly right into a tight knot throughout the middle of the looped thread.
STEP 3
Pull the ends of the five-inch thread upward, and the wound threads downward. Cut via the looped ends, and alter into a tassel form.
STEP 4
Cut a 12-inch duration of thread to wrap the tassel neck: Fashion one, give up the thread properly into a loop form, then lay the loop at the tassel. Grasp the opportunity stop and wrap it tightly around the tassel and over the pinnacle of the loop to steady it. Wrap slowly, operating from the top of the neck, so the neck threads lie flippantly after each extraordinary. As you wrap, ensure all the threads in the head and skirt are well in the region. After wrapping the neck, bypass the top of the thread via the loop and gently near the loop, tucking the ends into the pinnacle of the tassel—trim tassel ends, some threads at a time, to even them if important. Use the tie-off threads on the pinnacle of the tassel to attach it to your venture.
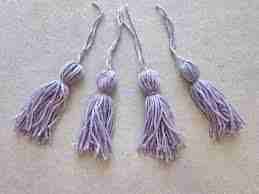
How to Make Mini Tassels
It’s better to use a fork with four tines. For the mini tassel, we use two strands from 2 bundles (crimson and orange) to make the craft quicker. Hold every strand together and cut out a 10 cm prolonged piece. Keep it aside for now.
Hold the open ends of each strand together and begin wrapping them across the fork (all four tines).
Take the 10 cm strands and insert them through the pinnacle slit of the fork. Keeping the strands at the bottom of the wrapped strands, carry out each open end from each facet.
Tie two tight knots with the ten cm strands to solidify the wrapped strands. Insert every different organization of strands via the top thing of the wrapped strands.
Tie the pinnacle strands tightly in 1 or 2 instances.
Carefully take out the wrapped strands from the fork.
Insert the top-tied strands thru the tied strands close to the pinnacle and align them with the wrapped strands.
Use scissors to lessen the closed ends of the wrapped strands.
Take a protracted piece of strands and maintain them together. Tie it at some point in the closed-top part of the tassel.
Coil the strands throughout the top element as usually as you need; however, make certain to keep a small length (2 instances of the tassel’s length) for the completion.
Insert the open ends of the ultimate strands via the coiled detail and align them with the tassel.
Use scissors to reduce and make the lowest part of the tassel even. You can use those mini tassels to redesign old portions of garments or add them to embroidery works on any garb or decor piece.
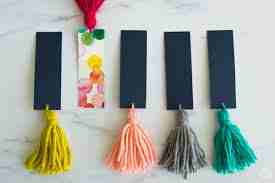
Make them enhance your clothes.
Tassels are a collection of fibers grouped and tied on the pinnacle, making them look like a flower. It is used on the quit of twine to hide the ends and as a decorative detail in accessories, domestic decor, and at the time, even clothes.
Easy tassels with thread
Take a set of thread (one entire embroidery floss might do) and maintain it around your cord, as in the photograph under.
- Tie at the top, catching the cord and the thread, some 1/2 inch from the pinnacle.
- Tie the floss and the cord collectively 1/2 of an inch from the pinnacle
- Tie the floss and the cord collectively 1/2 inch from the pinnacle
- Bring the complete thread to the front, flipping it. Tie each other thread to capture the whole thread, some half of an inch down.
- Turn the floss down, after which tie it over again
- Fluff up your tassel threads with a hair comb.
Choose the Right Yarn
When selecting your yarn, recall the shape of tassels you would love. Thicker yarn will produce fluffier tassels, and at the same time, thinner yarns will produce smaller, sleeker tassels. Don’t be afraid to mix yarns if you want to make a tassel with a piece with more texture.