What’s the cope with bloodless foam? It’s clear that suitable. You’ve seen this trend at Starbucks, and permit me to assist you in understanding: we’re wary of any food style. But this one surely holds up! Cold foam is the solution to a whipped topping for iced espresso beverages, and man is delicious. The creamy topping truly presents the proper frothy appeal without loads of greater power. Even higher: you can make it at home! Here’s a way to make cold foam: a DIY Starbucks recipe to enjoy this treat at home.
What is bloodless foam?
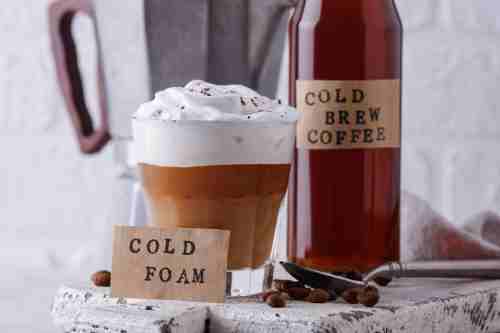
Cold foam is frothed nonfat milk that makes a frothy topping for bloodless coffee beverages like iced coffee, bloodless brew, iced cappuccinos, and nitro coffee. It stimulates the frothy topping of the steamed milk in a latte or cappuccino; however, at a cold temperature, it doesn’t soften while hitting the drink.
Cold foam sits atop a drink with a thick, frothy texture and regularly settles in as you sip it. Because it’s made with nonfat milk, it presents first-class a handful of electricity to the drink: however, the light candy crema topping has a maximum pay-off in texture! We’re careful of maximum tendencies here; however, this is truly delicious.
Ingredients for DIY Cold Foam
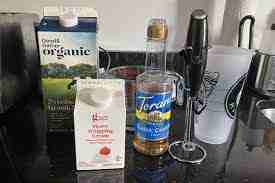
You need three substances to make our Test Kitchen recipe for DIY cold foam.
Milk (or opportunity “milk” ): Skim milk works awesome. Since it has a higher percentage of protein consistent with an ounce than whole milk or 2 percent, it whips up in a thick, robust style. Of course, those unique fats possibilities work as nicely as heavy cream or half of and 1/2 in case you need something even more decadent. Coconut cream, almond, oat, and coconut milk are artwork properly as a plant-based, totally virtual switch.
Sweetener: Simple syrup offers sweetness with no lingering taste, so it’s our top selection for DIY bloodless foam. To make it:
- Upload identical quantities of sugar and water to a small saucepan over medium heat.
- Stir and cook dinner until the sugar is dissolved, then switch to a mason jar or a different hermetic garage vessel.
- Use the interior for one month. You may use an identical quantity of maple, honey, or a shop-bought flavored coffee syrup to sweeten your DIY bloodless foam.
Extract or spice: An non-obligatory—but noticeably endorsed—part of our DIY bloodless foam components, we love to jazz up our cold foam with vanilla extract or bean paste. Feel free to get contemporary and flavor your cold foam with some difficulty. A sprint of matcha tea powder is stellar to top tea lattes, or attempt a pinch of pumpkin spice to top your coffee latte. You can even blend in a small spoonful of fruit puree. Or try some different tastes of extracts like almond or maple.
How to Make DIY Cold Foam
The homemade bloodless foam seems excellent. However, it is virtually a breeze to make. Before we dive right into making DIY cold foam, spherical up the materials mentioned above and your foaming tool of choice. You have a few alternatives.
Milk frother: This is the perfect, speediest, and smallest-to-keep opportunity, and expenses much less than $20 at most vital stores.
Immersion blender: Basically like a larger version of the frother (that can accomplish many different duties like blitzing up soups and sauces, too).
French press: Pour the elements into the pitcher, then use short pumps of the clicking until the milk begins to foam.
Regular blender: For massive batches of DIY cold foam, revel in unfastened to apply your massive countertop blender or a smaller smoothie blender. Add all the factors to the pitcher or cup and blend until the milk appears foamy and complete.
Mason jar: For an arm exercising and serving DIY bloodless foam unexpectedly, upload the factors to a mason jar. Top with a lid and shake vigorously till the milk is foamy.
To make DIY bloodless foam, here are the ratios of the components you may want.
¼ cup milk (or milk substitute)
One teaspoon of easy syrup (or distinct liquid sweetener)
¼ teaspoon vanilla extract (or spice, extract, or taste booster of preference)
Add milk, syrup, and extract to a tall glass, pitcher, or jar. Place the milk frother into the vessel, allowing the whisk element to submerge completely.
Turn at the milk frother and mix till the milk starts offevolved to thicken and stabilize, or approximately 20 seconds. Slowly increase the wand toward the top of the milk, then out of the glass.
Gently use a spoon to switch the DIY cold foam to the top of your drink of desire.
If you have any greater foam, transfer it to a mason jar with a lid and keep it inside the refrigerator for up to a few days. Before serving, use a milk frother to deliver it again to life—or truly supply the jar a few vigorous shakes until it’s far foamy over again.
Which form of milk is exceptional for bloodless foam?
Traditional cold foam is made with nonfat dairy milk as it creates the thickest, stiffest foam.
But, out of interest, I desired to try out some specific sorts of milk to see how they compare.
I decided to try a protein shake (because I’m all about protein), skim milk, plant-based milk, and heavy whipping cream.
I introduced 1/four cup of every type of milk to a pitcher, used a milk frother for approximately 30 seconds, and here is how each has grown to be out:
As you can see, there are smooth variations in the ordinary quantity, and skim milk is an easy winner.
I’ll ruin each in a piece with more elements underneath, but I will skip the protein shake version. As you can see via the photograph (on the far left), the protein shake created a few bubbles but no solid foam, so I would only propose going in a different direction.
How to use cold foam at home
You can use cold foam on various bloodless brew coffees as you spot in shape, but you can moreover apply it to the top of flavored iced coffee. The foam is an opportunity to include milk or a milk opportunity on your espresso.
The foam lies on the coffee choice to pour and combine it. It will create a reality considered of a type mouthfeel and flavor fantastic.
If you were given to make the cold foam with one of the strategies listed, I’m sure you’ll need to attempt it.
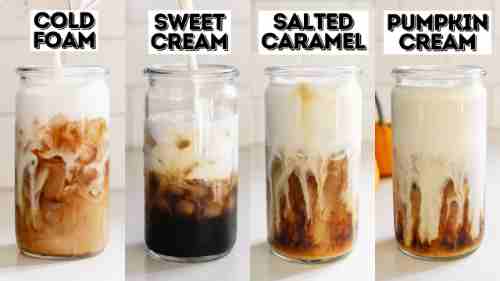
I’ve listed some cold coffees so one can taste notable with the addition of the saliva and are the house-made versions of what you’d get at Starbucks:
Cold brew with cold foam
I advise the usage of the foam in location inclusive of milk to your coffee. As the foam is made of milk, you don’t need to double the amount used because this could super dilute your iced coffee drink.
If you’d need to try a cold foam that uses vanilla syrup (or vanilla extract) as a sweetener, you may test out the sweet vanilla cream cold foam recipe here.
This bloodless foam model from Starbucks can be made in the same manner I’ve proven to you in this newsletter, making it much less tough so that you can strive for new flavors.
Conclusion
It’s exceptional what you can reap with difficulty as clean as milk. Milk is already a good addition to any iced espresso, but this foamy goodness wins all of it.
I went over five strategies you can use to make a number of this tremendous foam at home. So, that one approach works brilliantly; intending to start making it yourself.
If you need to research more about coffee, you could test the articles underneath. I’ve indexed some articles that might be a hobby for you.
Have you tried cold foam earlier? Let me recognize via leaving a remark down underneath. If you’ve got a few other questions concerning coffee, you may contact me right now by pressing the “Contact Me” button on the pinnacle!