It is essential to remove McAfee when you’re switching to another antivirus service or need to install it for troubleshooting reasons. Why? The uninstallation process can help solve issues caused by incompatible or damaged file formats.
A McAfee uninstallation is easy and can be accomplished through Microsoft Windows 11, which has the “Apps and Features” console. But, if you face problems, you’ll have to utilize McAfee’s McAfee Consumer Product Removal tool or sign into Windows the Super Administrator account to remove McAfee.
Review Your Windows Defender Security Settings
If you decide not to restart McAfee or install a different antivirus program, Windows 11 will automatically return to using Windows Defender to protect your computer from malware. It’s recommended to install Windows Defender correctly. How to do this:
Just right-click Start on your PC and choose Settings.
Choose Privacy and Security on the Settings App’s sidebar. Next, select Windows Security.
Choose the turn-on button near any active antivirus protections available within Windows Defender–e.g., virus & threats protection, Firewall and network security, etc.
In addition, visit Virus and Threat Protection> Protection updates, then select the update option to upgrade the definitions of malware used within Windows Defender.
Altogether, Remove McAfee From Windows 11
Congratulations! It’s been successfully removed from your computer and eliminated McAfee from Windows 11. If you do not have any plans to install the program to the Windows PC or any other device, you can visit the McAfee account management console using an internet browser. Then, you can remove your subscription or opt for a free trial to avoid getting charged. Contact us at McAfee Support for help with managing your subscription.
You should remove McAfee from your computer.
This is a complex issue. However, it is best not to leave your system unprotected by an antivirus. If you decide to remove McAfee from your computer, it’s best to install an alternative AV software immediately.
If you don’t install any Third-party AAntivirus, Windows 11 automatically begins Windows Defender on your system to provide the best protection.
In its initial release, Windows Defender was infamous for its memory usage within the background. This program could consume many system resources and slow your computer.
But Defender has come a far since its launch, and, as of Windows 11, it is an essential tool for protecting your computer.
So, you can safely remove McAfee from your PC since you can trust Windows Defender today. And if you’ve got an additional AAntivirusto to pull, de-installing McAfee is a good idea.
A system that is not protected security isn’t advised in today’s world that is continuously connected to the web.
Delete it by removing it from Windows Settings.
Windows offers its method to uninstall software. It is possible to do this using Apps > App and Features of Windows Settings. Follow these steps to remove McAfee through the Windows settings.
- Press the Windows Key and search/select Add or Remove programs. The action will bring you to the Apps section, then Features & Features.
- On the Apps list, type in McAfee.
- You will see a list named McAfee or something similar to McAfee @Total Protection. Hit the three-dotted icon to the right.
- Select to select the Uninstall option. By choosing this option, you will trigger the Uninstaller
- You will be presented with a “Select what you would like to Remove “section within the Uninstaller. You must make sure you check all of the boxes.
- Click on Remove.
- We get an email confirmation saying we completed the subscription. Go ahead and click Continue.
- Let the entire process be completed, and choose Restart Now at the end.
The method we’ve suggested should suffice for the majority of users. If the application isn’t removed, we recommend using the following form.
How do I remove McAfee in Windows 11?
It’s not recommended to run Windows without antivirus software, but it is to be mentioned that along with McAfee, Microsoft has built an additional security feature within Windows.
If McAfee has been causing problems, removing it from your computer is safe because Windows Defender protects your computer from malware and viruses.
What can I do to remove McAfee from my computer?
For uninstalling McAfee on your your,r PC, You can do this using the built-in Windows removal process or the McAfee removal software. In the control panel, select “programs and features,” look for McAfee in the list, then select “uninstalAlternativelytely, ” and download McAfee’s removal tool from their website. McAfee removes software from their site, launches it, and then adheres to the screen instructions provided, completely removing the application.
Do I have the option to uninstall McAfee through the Windows settings application?
Yes, you can uninstall McAfee by using the Windows settings application. Go to “settings” > “apps” > “apps and features.” Look for McAfee on the list, then click it and select “uninstall.” Follow the steps to complete the process of uninstallation.
What should I know before applying the McAfee removal tool? McAfee Removal Tool?
Before using the McAfee elimination tool, shut down and save any running programs or files. Restart your PC and unplug from the Internet. If you are using another security program, uninstall or turn it off turn it off temporarily to avoid conflict when you remove it.
What is the best way to access the control panel to deinstall McAfee?
The control panel by hitting the button to start, then typing “control panel” in the search box, and selecting the result that matches. The control panel will click “programs” > “programs and features,” which is where there is a list of the installed software, which includes McAfee.
Do I need to reboot my PC after de-installing McAfee?
Most of the time, restaokaystem after de-installing McAfee is unnecessary. But if you’re prompted in the removal process, you should comply with the directions and restart your system to ensure the changes have taken effect.
Can deinstalling McAfee erase all its leftover files?
Uninstalling McAfee using the typical Windows process could leave specific residual Registry entries or files. Use the McAfee removal software specifically designed to remove any remnants for better elimination.
Do I have to reinstall McAfee after deinstalling it?
Yes, you can reinstall McAfee after you have removed it. If you’d like to keep with McAfee, install the most recent software version and put it onto your system. Be sure to activate it with a valid subscription or license key.
What can I do if I have issues with McAfee removal?
If you have issues with McAfee uninstallation, consider using this McAfee removal tool rather than the standard Windows uninstall procedure. If the problem persists, contact McAfee customer service to seek solutions or get assistance from fellow users who encounter similar issues.
Are there ways to remove any McAfee parts instead of the complete collection?
If you’d like to keep specific components but take others off, you can use the typical Windows uninstall procedure to remove particular McAfee components. Click on “programs and features,” choose the item you wish to eliminate, then select “uninstall.”
Remove McAfee by using the McAfee Removal Tool.
If navigating through the settings is too laborious for you to remove the application altogether, or if the standard uninstalls don’t work on your system, use the removal tools from McAfee themselves to remove all trace traces of the application from your computer altogether.
Then, you must first install the McAfee Product Removal Tool (MCPR) for the Windows 11 PC. After downloading, go to the default downloads directory and double-click the. EXE file that you downloaded to start the tool.

When you have completed the process, you will see a UAC screen displayed on your display. Enter the account credentials if you’re not logged in using an administrator account. If not, press the “Yes” button to continue.
- From your MCPR screen, select the button ‘Next’ for the next step in the uninstallation process.
- The following screen will appear. Click on the radio icon that follows the “Agree” option; then, click the following button for the next screen.
- Once you have entered the CAPTCHA message into the text field in the image displayed on the screen, click next to verify it, and then move to the next step.
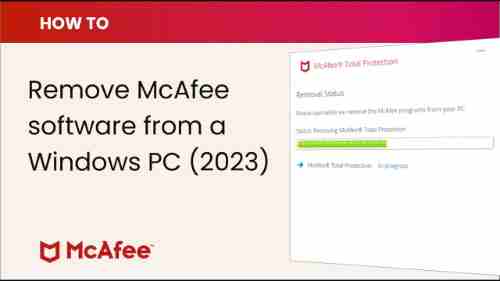
- Then, on the next screen, the McAfee Product Removal Tool will identify all installed software on your system. It will then delete all of them from your system.
After the operation is compelled, MCPR will notify of that on the display. After that, you can click the’ Restart’ button in the lower right-hand corner to reboot your PC and complete the entire process.
Conclusion
Suppose you’re looking to temporarily turn off McAfee or eliminate it from the Windows 11 PC; there are many ways to temporarily disable McAfee by turning off real-time scanning, scheduled scans, security scanners, and firewalls. In contrast, the easiest method to remove McAfee is via the Settings application by searching for McAfee’s antivirus under the ‘Apps & Features section. Then, click on “Uninstall”. If this approach isn’t working for you or your computer, you may use the McAfee Product Remove Tool to erase all traces of the application on your PC.
By following these easy steps, you are able to easily disable or uninstall McAfee and choose an alternative antivirus program that is more suited to your requirements.